Configure the environment for android in ubuntu server
First requirement for this is to have an android sdk and the compatible java installed in the server side.
The java version needs to be matched with the java version you are using in your
android project.
To install the android in the ubuntu server here is the reference link.
https://medium.com/@barcelos.ds/install-android-sdk-in-the-ubuntu-20-04-lts-withoutandroid-studio-1b629924d6c5
After installing the android sdk, you have to set the path for the same as ANDROID_HOME,
which will be used further while using the android and java inline commands.
Create Project and a plan for continuous integration
To start configuring the continuous integration, we need one project and a plan in bamboo server.
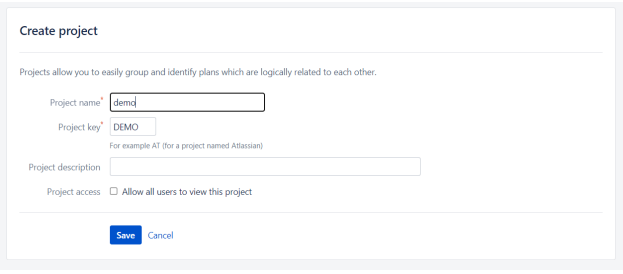
To create a project, login into your bamboo server and click on create project tab.

After clicking on the create project button, you need to give the basic information of the project as given below.
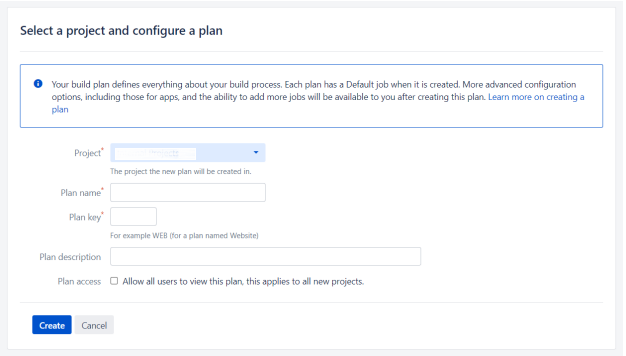
Now you need to create a plan. To create a project, login into your bamboo server and click on create plan tab.

After clicking on the create plan, you need to select the project you have created and give the plan name and description.
Configure the plan
Now the initial things we need is setup. We can configure the plan as per our requirement.
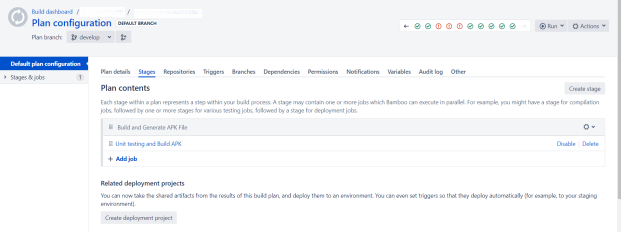
To configure the plan, go to your plan and the click on configure the plan option inside Action tab.
You have to go to the plan details and need to enable the plan.

Inside stages you can add stages as per your requirement.
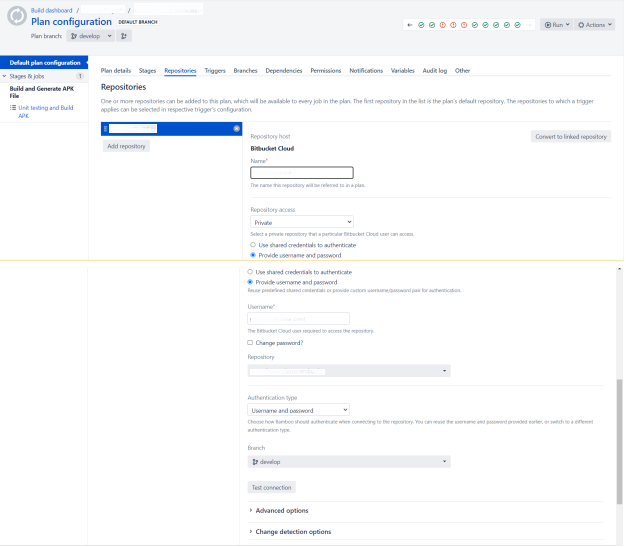
Inside the repository you can add the link of the respositoy you are working on. You need to select the provide username and password and generate the app password from the code management tool you are using to access the repository data.
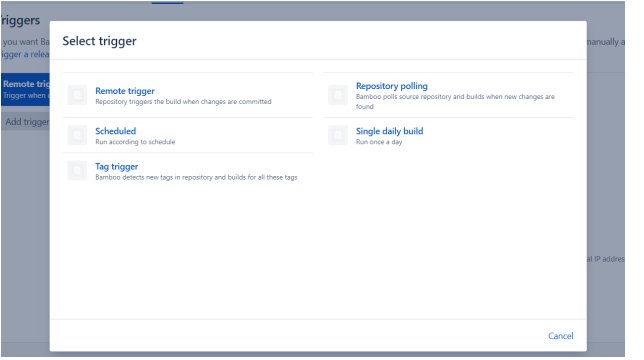
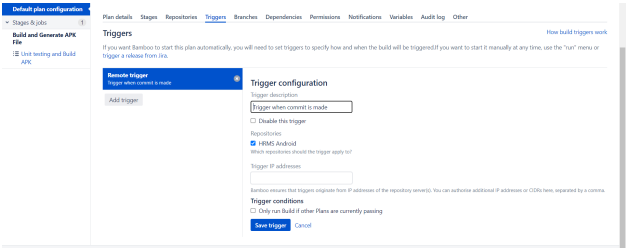
You can configure the trigger for when the plan is automatically start it’s build process.
There are verity of triggers available like we can configure.
Remote Trigger
It will automatically start the build process when commit is made to the branch.
Repository poling
It will fetch the repository data in specific interval of time, when it detect the changes it will
automatically start the build process.
Single day build
It will run the plan once a day.
Scheduled
It will run the plan with specified schedule.
Tag trigger
It will trigger the build if your commit is containing the specified tag. You can configure this tag using tag trigger with regular expression.
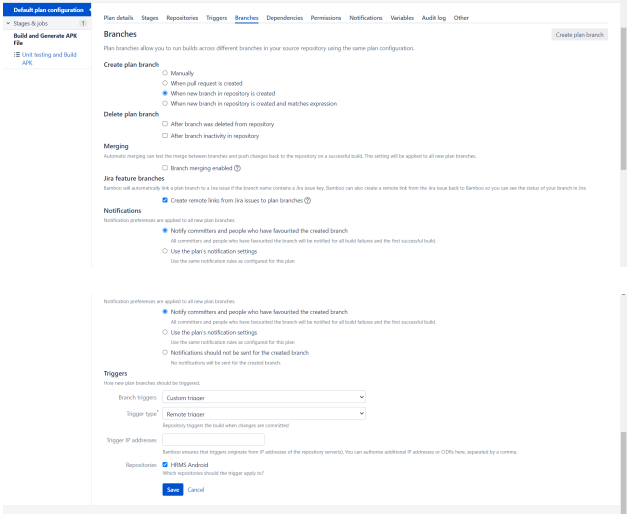
Then inside the branches, you can use same plan configuration for the different different
branches in your repository. See the screenshot below, we can run this plan for the branches that are created newly. Inside this section only we can have the setting up the trigger, we want to use.
From now on the plan is configured successfully, but it will still not trigger the automatic build process. For that we need to setup the webhook in the repository we are using.
The reference link to setup the webhook in bitbucket repository is attached below.
https://confluence.atlassian.com/bamboo0801/triggering-a-bamboo-build-from-bitbucket-cloud-using-webhooks-1101928665.html
Configure the stages
When you go to the stages the default stage will be automatically created. You can change the name of this. Click on this stage, you can see the tasks.
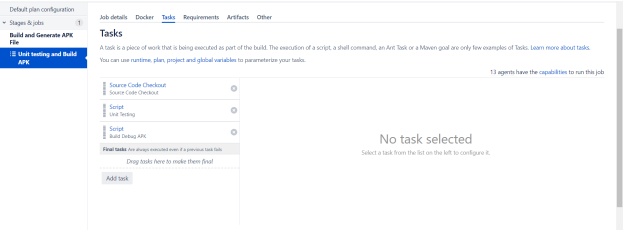
For the first time you will not see any tasks. We need to update these three task for the following purpose.
- When plan is start it’s build process, it will automatically fetch the source code from the
repository we given into the server. - It will perform the unit testing for the different product flavour we have in android project.
- It will start build the apk file for all of the product flavour we have in our project.
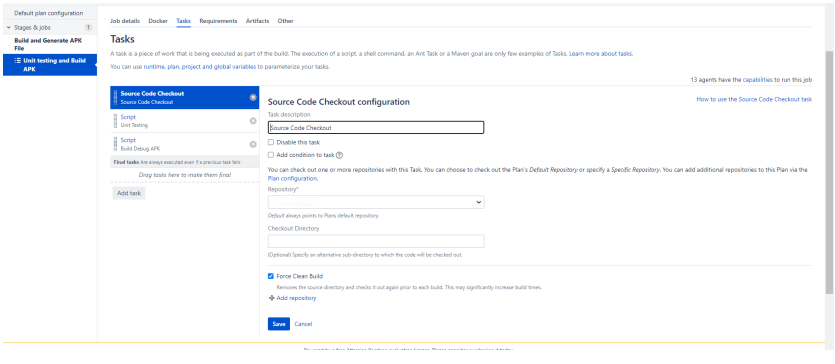
To fetch the source code we have to add the task called source code checkout. It will
automatically do the rest of things we just have to add this task in out stage. It is inbuilt task provided by bamboo.
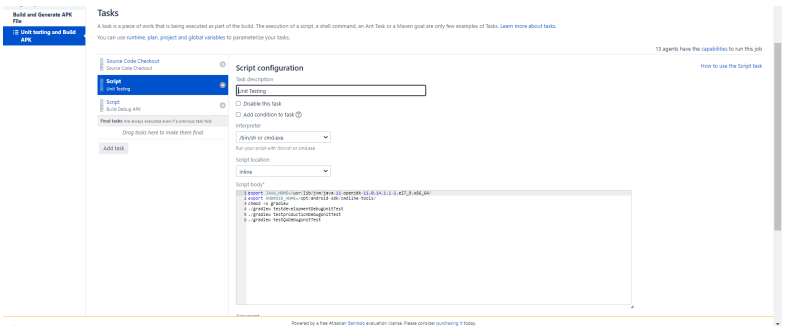
For unit testing we need to add task and select script and add the command as below.
These are the commands you need to add.
You can change the path of JAVA_HOME if you are not using java 1.8.
You can change the path of ANDROID_HOME with the path you have perform at the starting of this.
As we have three flavour product in our application, I have three command for all there variant.
You can change the command as per your preference. For example
./gradlew test{product_flavour_name}DebugUnitTest
export JAVA_HOME=/usr/lib/jvm/java-11-openjdk-11.0.14.1.1-1.el7_9.x86_64/
export ANDROID_HOME=/opt/android-sdk/cmdline-tools/
chmod +x gradlew
./gradlew testdevelopmentDebugUnitTest
./gradlew testproductionDebugUnitTest
./gradlew testQADebugUnitTest
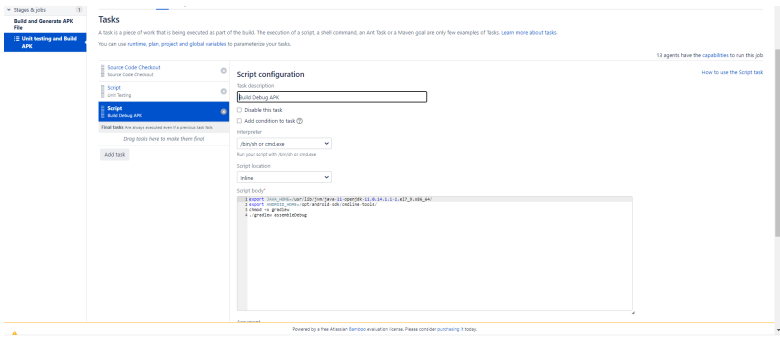
The next task is same as above one but this time we will give the command to generate the build apk files for three of the variant. The commands are same as below.
assembleDebug will generate all three variant of our android project.
export JAVA_HOME=/usr/lib/jvm/java-11-openjdk-11.0.14.1.1-1.el7_9.x86_64/
export ANDROID_HOME=/opt/android-sdk/cmdline-tools/
chmod +x gradlew
./gradlew assembleDebug
Setup the artifact to download the apk files
The last thing is to download the artifact(the build output) from the server. For this we need to create the three artifact of all three variant of the apk.
You can click on artifact option inside th specific stage. You can create artifact by clicking on the create artifact button.
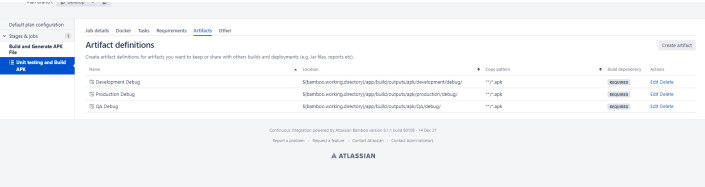
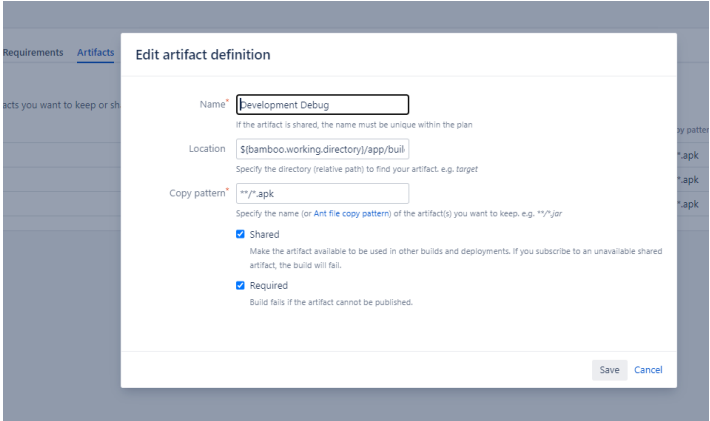
You need to configure the artifact as below.
As location you can give the path where your artifact is located. In below example you can see I am using different path for different build varient.
${bamboo.working.directory}/app/build/outputs/apk/development/debug/
${bamboo.working.directory}/app/build/outputs/apk/production/debug/
${bamboo.working.directory}/app/build/outputs/apk/QA/debug/
Inside copy pattern you have to set this option to download all apk files inside the specified location.
*/.apk
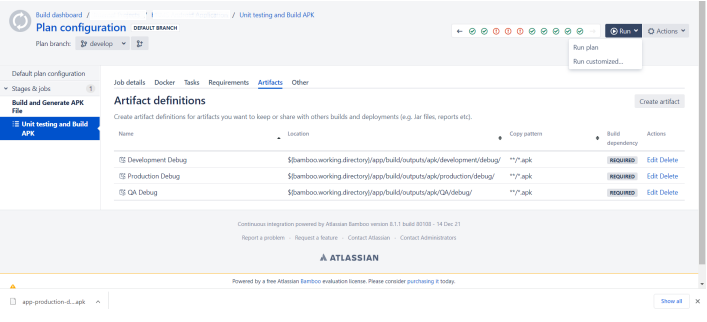
Now you can run the plan manually by clicking on this run plan option.
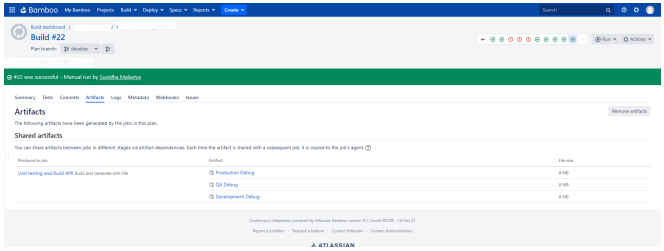
It will show you the result as below. You can go to the artifact option where you can download the apk file by clicking on the particular artifact.

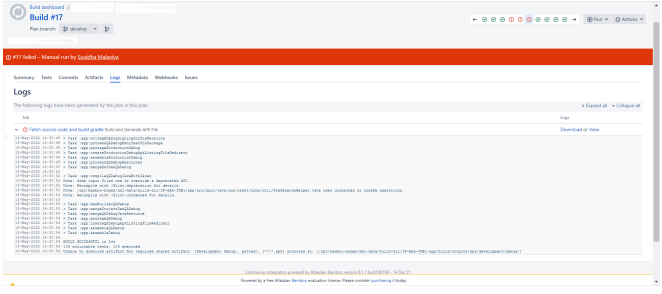
If you plan fails to build then you can check for the log section where you can see the errors or warnings.
In the commit section you can see the commit details.
Thank You.