Android Studio’s Project and editor windows
I introduced Android Studio’s main window at the end of Part 1. This window is divided into several areas, including a Project window where you identify an app’s resource files, and various editor windows where you’ll write the code and specify resources for mobile apps in Android Studio. The Project window and an editor window are shown in Figure 1.
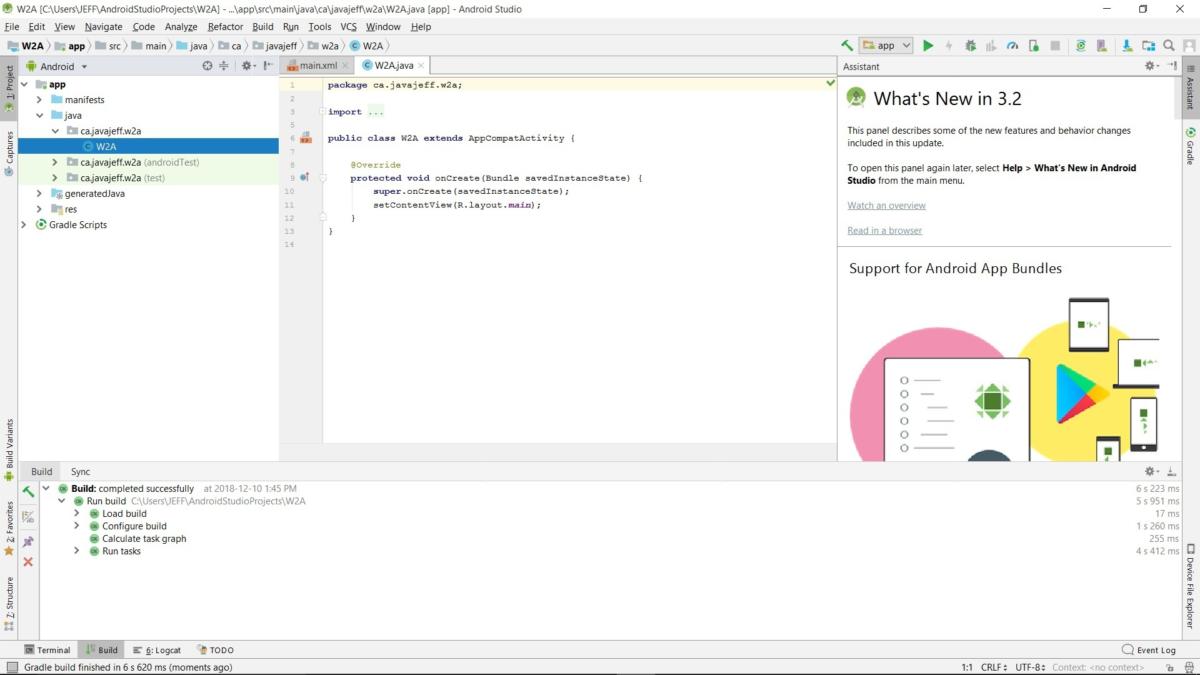
The Project window highlights W2A, which is the name of the app’s W2A.java source file (although the .java file extension isn’t shown). Corresponding to W2A is an editor window, reached by double-clicking W2A in the Project window. The editor window reveals the file’s current contents, in this case the skeletal Java source code for the app’s main activity.
Each editor window is associated with a tab. For example, W2A‘s editor window is associated with a W2A.java tab. A second tab identified as main.xml (the default XML-based layout for the app’s main activity) is also shown. You move from one editor window to another by clicking the window’s tab.
The Android example app
The example app (W2A.java) consists of a main activity that displays the Android robot character and a button. When the user presses the button, the robot animates through a series of colors. In this section, we’ll explore the activity’s source code and resources.
Explore and code the Android example app
The activity’s source code is stored in the file W2A.java, presented in Listing 1.
Listing 1. W2A.java
package ca.javajeff.w2a;

import android.app.Activity;

import android.graphics.drawable.AnimationDrawable;

import android.os.Bundle;

import android.view.View;

import android.widget.Button;
import android.widget.ImageView;

public class W2A extends Activity
{
   AnimationDrawable androidAnimation;

   @Override
   public void onCreate(Bundle savedInstanceState)
   {
      super.onCreate(savedInstanceState);
      setContentView(R.layout.main);
      ImageView androidImage = (ImageView) findViewById(R.id.android);
      androidImage.setBackgroundResource(R.drawable.android_animate);
      androidAnimation = (AnimationDrawable) androidImage.getBackground();
      final Button btnAnimate = (Button) findViewById(R.id.animate);
      View.OnClickListener ocl;
      ocl = new View.OnClickListener()
      {
         @Override
         public void onClick(View v)
         {
            androidAnimation.stop();
            androidAnimation.start();
         }
      };
      btnAnimate.setOnClickListener(ocl);
   }
}
The W2A.java file starts with a package statement, which names the package (ca.javajeff.w2a) that stores the W2A class. This is followed by a series of import statements for various Android API types. Next, the code describes the W2A class, which extends android.app.Activity.
W2A first declares an androidAnimation instance field of type android.graphics.drawable.AnimationDrawable. Objects of type AnimationDrawable describe frame-by-frame animations, in which the current drawable is replaced with the next drawable in the animation sequence.
The onCreate() method
All of the app’s work takes place in W2A‘s overriding onCreate(Bundle) method: no other methods are required, which helps to keep this app simple.
onCreate(Bundle) first invokes its same-named superclass method, a rule that must be followed by all overriding activity methods.
This method then executes setContentView(R.layout.main) to establish the app’s user interface. R.layout.main is an identifier (ID) for an application resource, which resides in a separate file. You interpret this ID as follows:
Ris the name of a class that’s generated when the app is being built. This class is namedRbecause its content identifies various kinds of application resources, including layouts, images, strings, and colors.layoutis the name of a class that’s nested withinR. An application resource whose ID is stored in this class describes a specific layout resource. Each kind of application resource is associated with a nested class that’s named in a similar fashion. For example,stringidentifies string resources.mainis the name of anint-based constant declared withinlayout. This resource ID identifies the main layout resource. Specifically,mainrefers to amain.xmlfile that stores the main activity’s layout information.mainisW2A‘s only layout resource.
Passing R.layout.main to Activity‘s void setContentView(int layoutResID) method instructs Android to create a user interface screen using the layout information stored in main.xml. Behind the scenes, Android creates the user interface components described in main.xml and positions them on the device screen as specified by main.xml‘s layout data.
The screen is based on views (abstractions of user interface components) and view groups (views that group related user interface components). Views are instances of classes that subclass the android.view.View class and are analogous to AWT/Swing components. View groups are instances of classes that subclass the abstract android.view.ViewGroup class and are analogous to AWT/Swing containers. Android refers to specific views (such as buttons or spinners) as widgets.
Continuing, onCreate(Bundle) executes ImageView androidImage = (ImageView) findViewById(R.id.android);. This statement first calls View‘s View findViewById(int id) method to find the android.widget.ImageView element declared in main.xml and identified as android. It instantiates ImageView and initializes it to the values declared in the main.xml file. The statement then saves this object’s reference in local variable androidImage.
ImageView and AnimationDrawable
Next, the androidImage.setBackgroundResource(R.drawable.android_animate); statement invokes ImageView‘s inherited (from View) void setBackgroundResource(int resID) method, setting the view’s background to the resource identified by resID. The R.drawable.android_animate argument identifies an XML file named android_animate.xml (presented later), which stores information on the animation, and which is stored in res‘s drawable subdirectory. The setBackgroundResource() call links the androidImage view to the sequence of images described by android_animate.xml, which will be drawn on this view. The initial image is drawn as a result of this method call.
ImageView lets an app animate a sequence of drawables by calling AnimationDrawable methods. Before the app can do this, it must obtain ImageView‘s AnimationDrawable. The androidAnimation = (AnimationDrawable) androidImage.getBackground(); assignment statement that follows accomplishes this task by invoking ImageView‘s inherited (from View) Drawable getBackground() method. This method returns the AnimationDrawable for the given ImageView, which is subsequently assigned to the androidAnimation field. The AnimationDrawable instance is used to start and stop an animation, a process I’ll describe shortly.
Finally, onCreate(Bundle) creates the Animate button. It invokes findByViewId(int) to obtain the button information from main.xml, then instantiates the android.widget.Button class.
It then employs the View class’s nested onClickListener interface to create a listener object. This object’s void onClick(View v) method is invoked whenever the user clicks the button. The listener is registered with its Button object by calling View‘s void setOnClickListener(AdapterView.OnClickListener listener) method.
To stop, then start the animation, Animate‘s click listener invokes androidAnimation.stop(); followed by androidAnimation.start();. The stop() method is called before start() to ensure that a subsequent click of the Animate button causes a new animation to begin.
Update and save your code
Before we continue, replace the skeletal code in your W2A.java tab with the code from Listing 1. Save the contents of this window by pressing Ctrl+S, or select Save All from the File menu.
Coding the Android app’s main.xml
The app’s main activity is associated with an XML-based layout, which is stored in file main.xml, and which is presented in Listing 2.
Listing 2. main.xml
<?xml version="1.0" encoding="utf-8"?>
<LinearLayout xmlns:android="http://schemas.android.com/apk/res/android"
              android:orientation="vertical"
              android:layout_width="fill_parent"
              android:layout_height="fill_parent"
              android:gravity="center"
              android:background="#ffffff">
   <ImageView android:id="@+id/android"
              android:layout_width="wrap_content"
              android:layout_height="wrap_content"
              android:layout_marginBottom="10dip"/>
   <Button android:id="@+id/animate"
              android:layout_width="wrap_content"
              android:layout_height="wrap_content"
              android:text="@string/animate"/>
</LinearLayout>
After the XML declaration, Listing 2 declares a LinearLayout element that specifies a layout (a view group that arranges contained views on an Android device’s screen in some manner) for arranging contained widgets (including nested layouts) either horizontally or vertically across the screen.
The <LinearLayout> tag specifies several attributes for controlling this linear layout. These attributes include the following:
orientationidentifies the linear layout as horizontal or vertical. Contained widgets are laid out horizontally or vertically, and the default orientation is horizontal."horizontal"and"vertical"are the only legal values that can be assigned to this attribute.layout_widthidentifies the width of the layout. Legal values include"fill_parent"(to be as wide as the parent) and"wrap_content"(to be wide enough to enclose content). (Note thatfill_parentwas renamed tomatch_parentin Android 2.2, but is still supported and widely used.)layout_heightidentifies the height of the layout. Legal values include"fill_parent"(to be as tall as the parent) and"wrap_content"(to be tall enough to enclose content).gravityidentifies how the layout is positioned relative to the screen. For example,"center"specifies that the layout should be centered horizontally and vertically on the screen.backgroundidentifies a background image, a gradient, or a solid color. For simplicity, I’ve hardcoded a hexadecimal color identifier to signify a solid white background (#ffffff). (Colors would normally be stored incolors.xmland referenced from this file.)
The LinearLayout element encapsulates ImageView and Button elements. Each of these elements specifies an id attribute, which identifies the element so that it can be referenced from code. The resource identifier (special syntax that begins with @) assigned to this attribute begins with the @+id prefix. For example, @+id/android identifies the ImageView element as android; this element is referenced from code by specifying R.id.android.
These elements also specify layout_width and layout_height attributes for determining how their content is laid out. Each attribute is assigned wrap_content so that the element will appear at its natural size.
ImageView specifies a layout_marginBottom attribute to identify a space separator between itself and the button that follows vertically. The space is specified as 10 dips, or density-independent pixels. These are virtual pixels that apps can use to express layout dimensions/positions in a screen density-independent way.
Choosing and saving a new layout
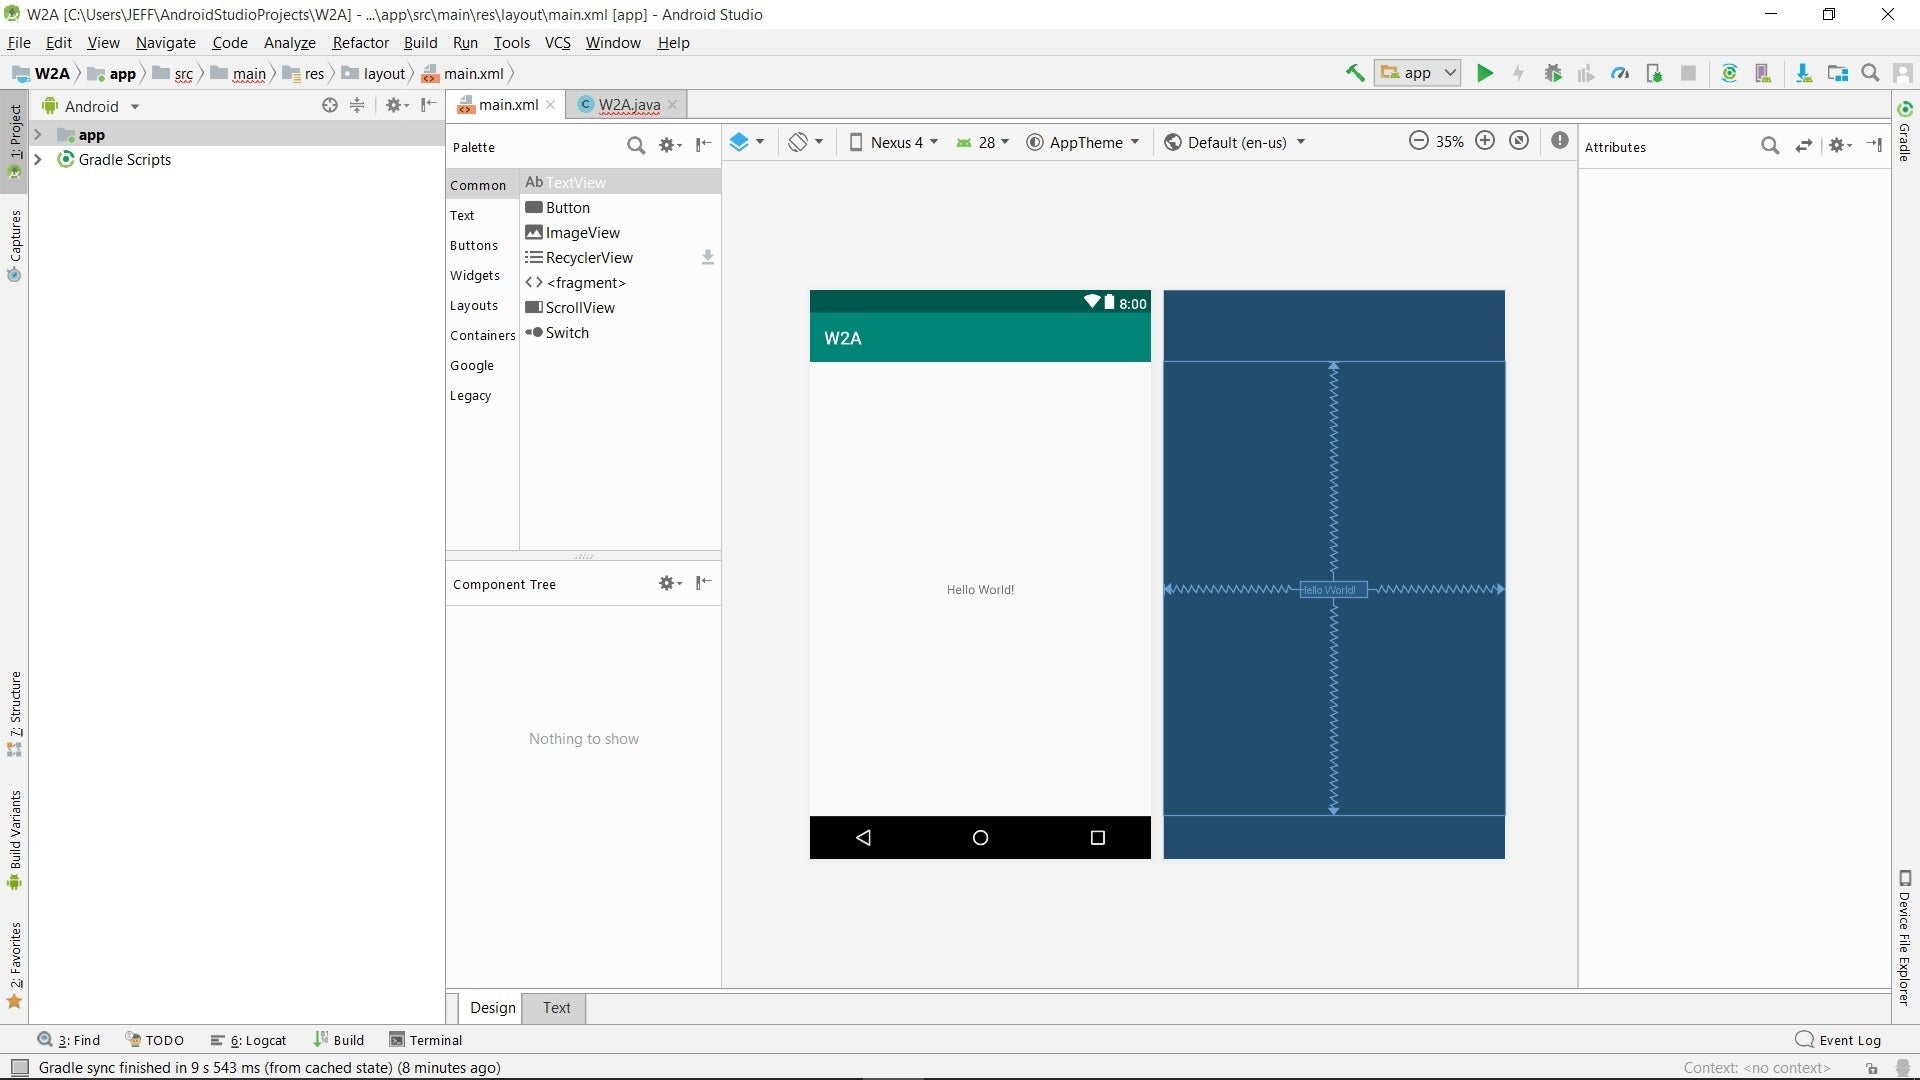
You might recall that when we set up the app in Part 1, we selected the empty activity template. It turns out the XML layout this template provides isn’t appropriate for our app. To choose a new layout, start by clicking the main.xml tab. Android Studio responds by displaying a user-friendly layout editor:
Jeff Friesen
Before we move on, click the Text tab (the Design tab is shown by default) at the bottom of the main.xml tab. Replace the template XML with the code from Listing 2 (above), then save the contents of this window.
Coding the Android app’s strings.xml
W2A relies on strings.xml to store string data that is referenced from other locations. Refer back to Listing 2 and you’ll notice that the <Button> tag includes an android:text="@string/animate" attribute. This attribute references the button’s text via @string/animate, which references a string resource named animate that’s stored in strings.xml. Listing 3 presents this file’s contents.
Listing 3. strings.xml
<?xml version="1.0" encoding="utf-8"?>
<resources>
   <string name="app_name">W2A</string>
   <string name="animate">Animate</string>
</resources>
As well as animate, Listing 3 reveals a string resource identified as app_name. This resource ID identifies the app’s name and is referenced from the app’s AndroidManifest.xml file, typically from the label attribute of the application element start tag.
Save strings.xml
In your Project window, the values subbranch of the res subbranch includes a strings.xml subbranch. Double-click this subbranch to show the strings.xml tab, then replace its contents with Listing 3 and save the changes.
Coding the Android app’s animate.xml
Finally, W2A relies on android_animate.xml, which stores an animation list of drawable items. Listing 4 presents the contents of this file.
Listing 4. android_animate.xml
<animation-list xmlns:android="http://schemas.android.com/apk/res/android"
                android:oneshot="true">
   <item android:drawable="@drawable/android0" android:duration="500" />
   <item android:drawable="@drawable/android1" android:duration="500" />
   <item android:drawable="@drawable/android2" android:duration="500" />
   <item android:drawable="@drawable/android0" android:duration="500" />
</animation-list>
Listing 4 starts with an animation-list element that describes the drawable sequence. This element’s oneshot attribute determines if the animation will cycle in a loop (when this attribute is assigned "false") or occur only once (when it’s assigned "true"). When "true" is assigned to oneshot, you must invoke AnimationDrawable()‘s stop() method before its start() method to generate another oneshot animation sequence.
Nested inside the animation-list element is a sequence of item elements. Each item element identifies one drawable in the animation sequence via its drawable attribute. The @drawable/androidx resource reference (where x ranges from 0 through 2) identifies an image file whose name starts with android. The duration attribute identifies the number of milliseconds that must elapse before the next item element’s drawable is displayed.
Save animate.xml
In the Project window, right-click the drawable subbranch of the res subbranch. Figure 3 shows the resulting pop-up menu.
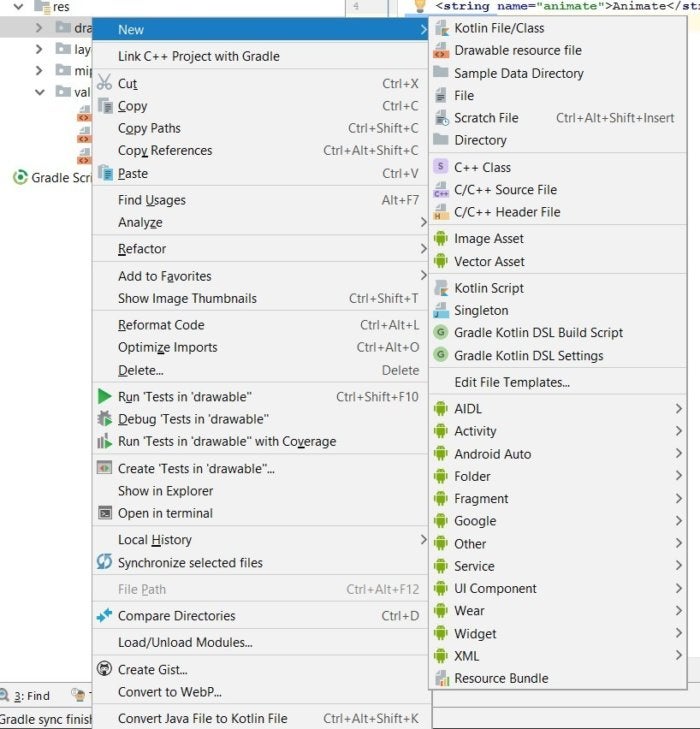
Select New from the pop-up menu, followed by File. Figure 4 shows the resulting Choose Destination Directory dialog box.
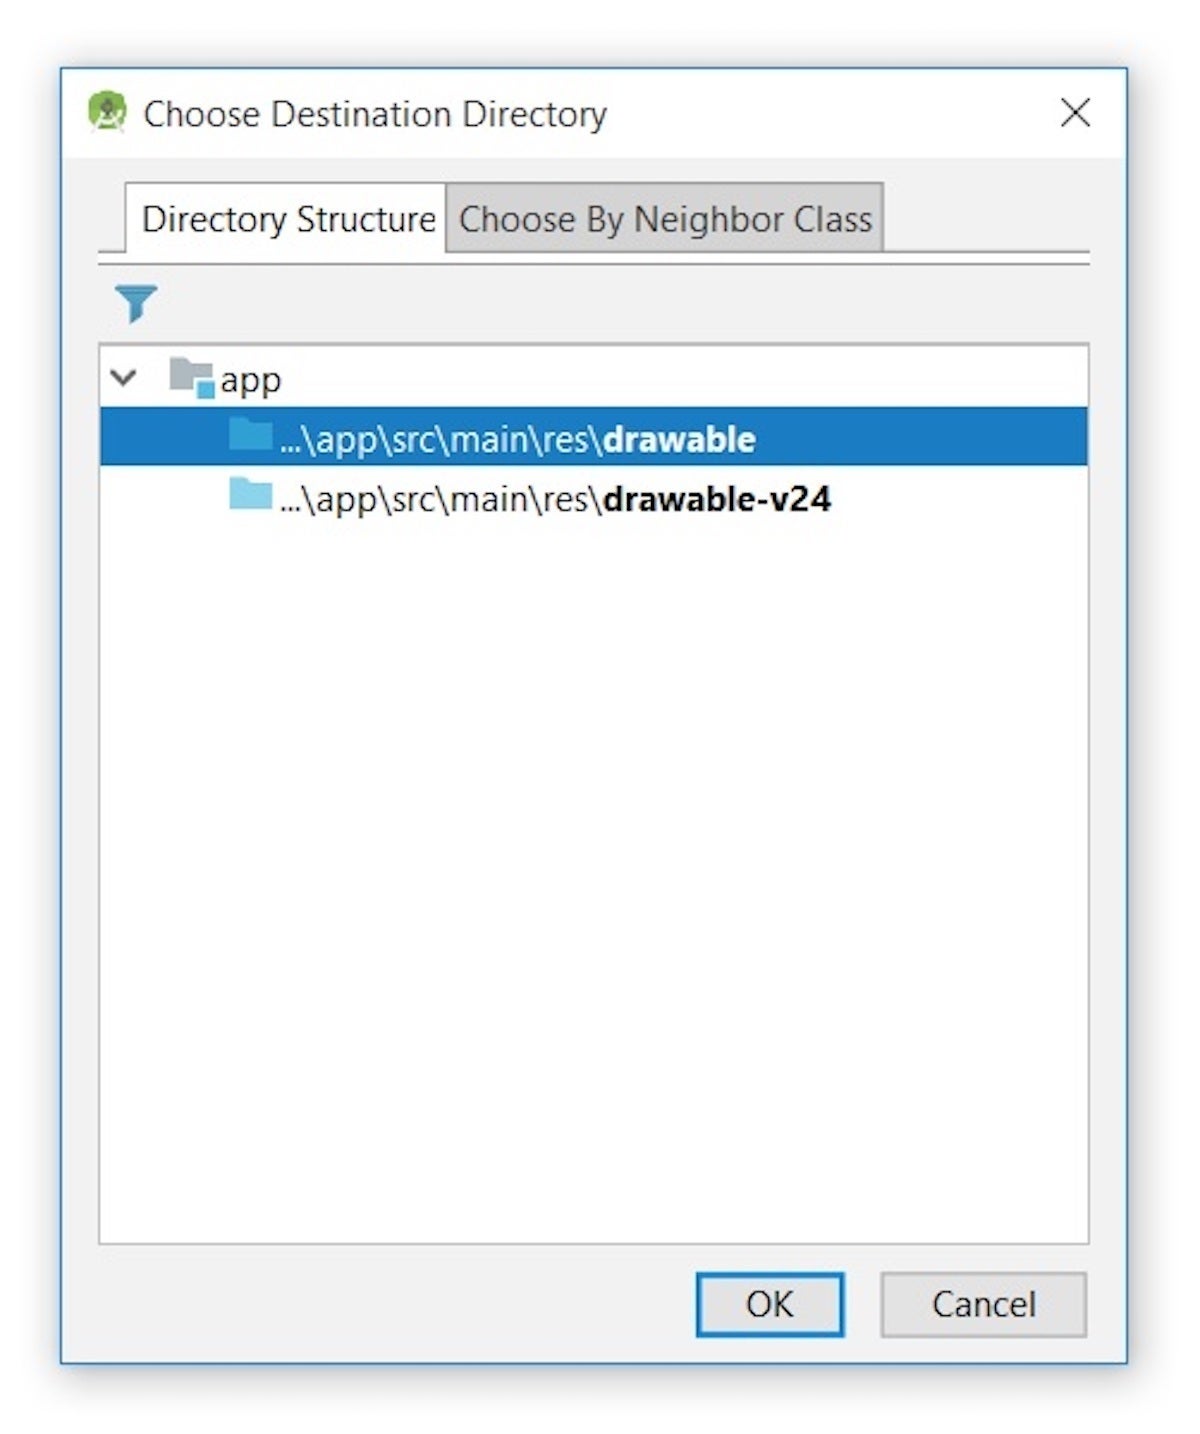
Classic drawable resources such as images are stored in the drawable folder. In contrast, vector drawables are stored in drawable-v24. For this project, keep the drawable default and click OK. You should now see the New File dialog box.
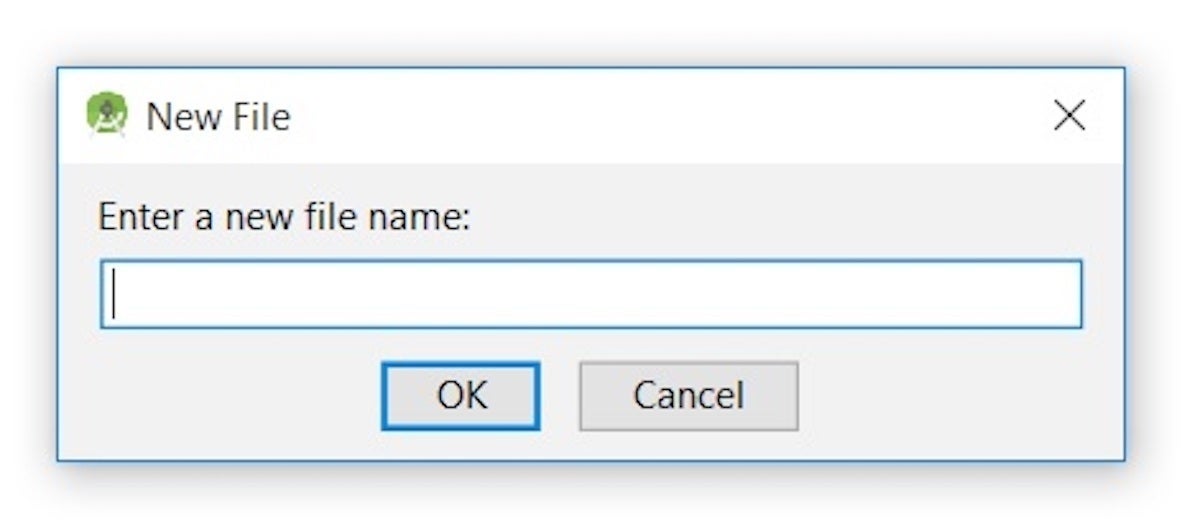
Type android_animate.xml into the Enter a new file name text field and click OK. (You’ll see an android_animate.xml subbranch under the drawable subbranch.) Then, replace the contents of the resulting android_animate.xml tab with the code from Listing 4 (above) and save the changes.
You’ll also need to copy the android0.png, android1.png, and android2.png files (referenced in Listing 4) from the source code associated with this article to the drawable branch. Assuming you’re working in Windows, select these files from Windows Explorer and paste them into the android_animate.xml branch (right-click the branch name and select Paste).